| Welcome to J-Model Works! (Japanese Title, Mokei no Hanamichi) My Models, Step by Step, Tips, Information, and so on! |
|
| HOME>>Model Gallery>>1/700 IJN CV Kaga>>This page
|
|
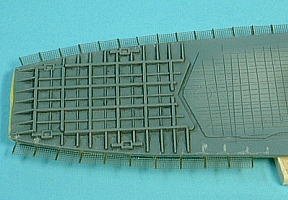
As for the kit the panel line is convex mold. For the reason, I shaved all the surfaces and carved the ditch of the panel line by art-knife.
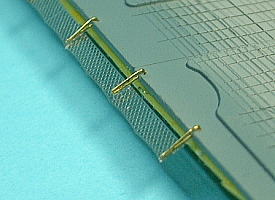
The wide use etching mesh parts are used, to safe net for personnel. The photoetch for the aircraft carrier from "Gold Medal Model" are used, to safe net for aircraft.
Flight deck surface becomes wide a little of the width, because the ditch is carved. Therefore, the difference happens to the reverse side and width. Several ditches are carved in the reverse side, to offset it. If you see the image of the top, you should understand that.
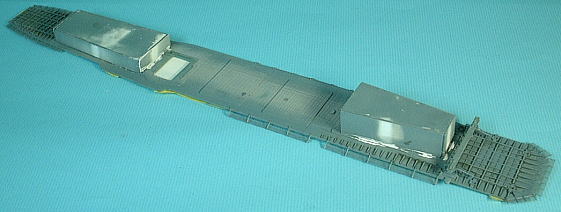
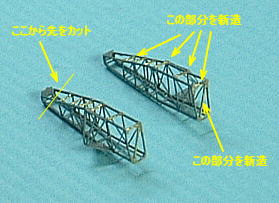
The crane had better be exchanged to the photoetch. Here the etching parts of "Japanese aircraft carrier 2" from "Tom's Model Works" were used. The parts of this maker are made of an extremely thin brass board. The parts of this maker transform even a little power. I had to pay attention to that handling. I was adding the brass line to this for reinforcement. Furthermore, I cut it so that I fit the size of kit.
The details are introduced Detailing 1/700 scale aircraft with the photoetch: Part 2 in "Model Tech Tips".
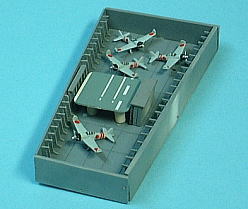
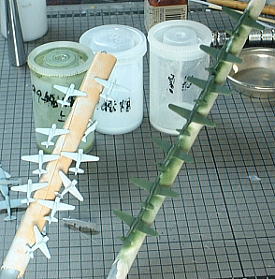
I put airplanes of hold wing condition into the hangar, and glued it into flight deck.
I attached hangar firmly, because repair is not possible when it misses later.
|
|
| Return to Top of This Page
HOME>>Model Gallery>>1/700 IJN CV Kaga>>This page |
|
Copyright(C) Omami the webmaster of J-Model Works / Mokei no Hanamichi All right reserved |


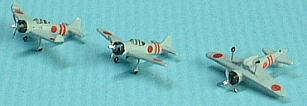
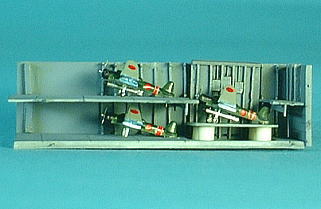
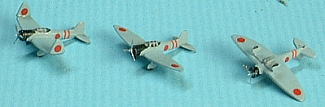 I caused the volume by serving putty to these landing gear boots.
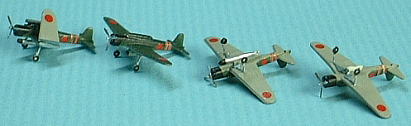 This photoetch part is for the first time, that exclusive use Type97 Model12
Carrier Attacker exclusive use landing gear is commercialized.
This photoetch part is for the first time, that exclusive use Type97 Model12
Carrier Attacker exclusive use landing gear is commercialized.