 |
 |
 |
 |
 |
 |
 |
 |
 |
 |
|
| The following Japanese famous hobby stores are written in English and can
ship to oversea! |
 |
|
  |
|
 |
|
 |
|
|
|
| Remodel of FUJIMI 1/24 scale Enthusiast model Series Lamborghini Countach LP400 |
| How to build Lamborghini Countach LP500 Prototype |
|
 Step 2: Remodel of Chassis and Engine Step 2: Remodel of Chassis and Engine
Although a mass production countach series had tube frame, prototype had
a steel plate chassis. Although it was not perfect since data were insufficient,
I replicated this structure.
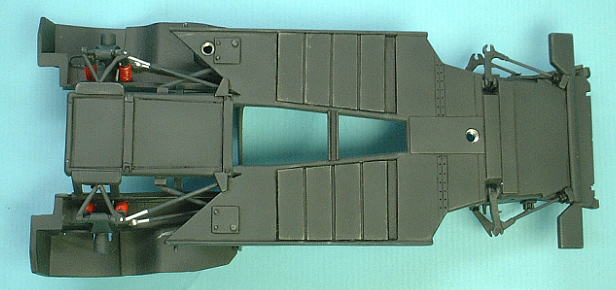
 Remodel of Bottom Plate Remodel of Bottom Plate
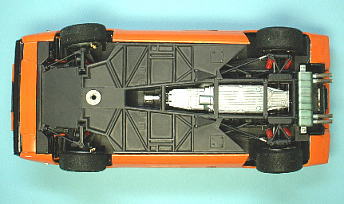
This photo is the bottom plate of LP400 model kit. Tube frame is molded
on it.
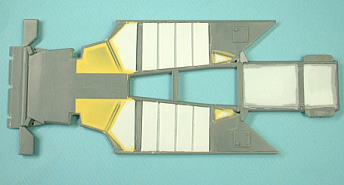
I shaved projected tube frame mold and Inverse triangle form ducts. This
shaved part became large hollow.
I buried the plastic sheet which imitated the press line on large hollow
part, the mark of ducts and engine bottom part. Furthermore I buried the
groove tube frame mold by polyester putty.
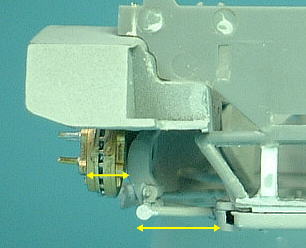
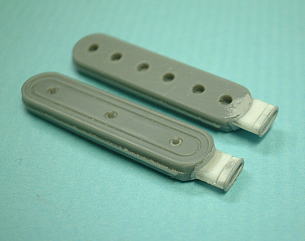
Remodel of Engine mounting flame
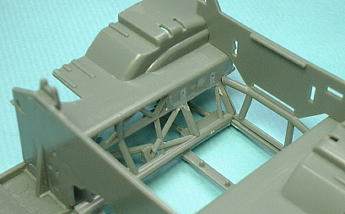
This photo is the engine mounting flame of LP400 model kit. It had circle
section aluminum tube flame. However, the prototype had square section
steel frame.
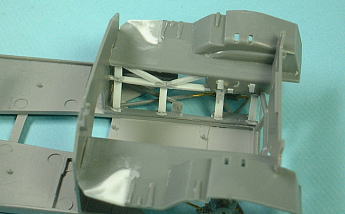 I cut the circle section tube parts, next I attached square plastic rods. Those were connected by 0.3mm brass line to keep strength. I cut the circle section tube parts, next I attached square plastic rods. Those were connected by 0.3mm brass line to keep strength.
In this way the engine mounting flame was build. The both sides have the triangle notches. These are the portions into which NACA ducts fit. I buried them by plastic sheet because Those were unnecessary for the prototype.
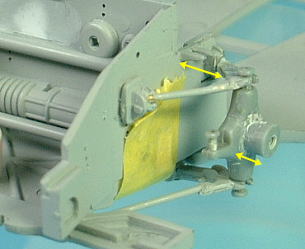
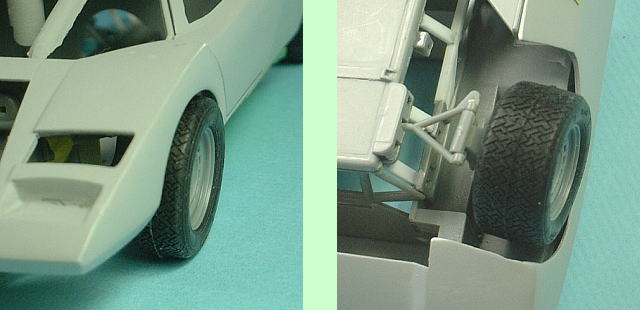
Correction of Ground clear and Track
Front and rear tire projected at the fenders, and ground clear is too high.
Furthermore, Since front nose was remodeled, the position of tire shifted
back a little.
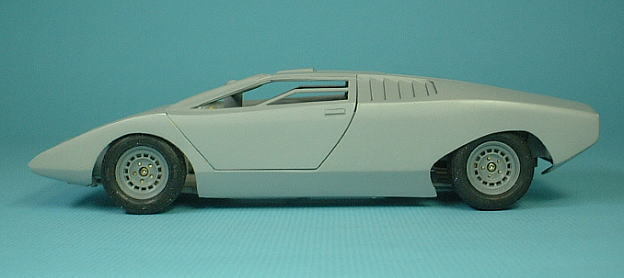
I corrected ground clear and track by the same method as LP400S. The position of 4 tire were corrected by shifting to forward 2mm. (The
parts that were pointed out by yellow arrows were condensed length. )
Rear Suspension was modified lower about 2mm than LP400S. (The parts that were pointed out by yellow arrows were condensed length. )
I lowered the ground clear too much when before remodeling time (Step 4) for reasons beyond it's control.
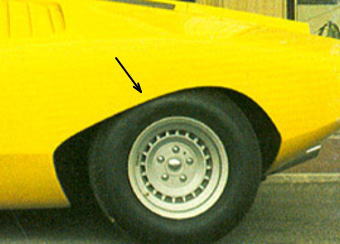 The rear tires of 1:1 real car are on top of the edge of the rear fender arches a little. But in the case of this model, the rear tires are not on top of the edge of the rear fender arches, because the diameter of the tire is smaller than 1:1 real tire. I could not but move the ground clear too much to copy those positions. The rear tires of 1:1 real car are on top of the edge of the rear fender arches a little. But in the case of this model, the rear tires are not on top of the edge of the rear fender arches, because the diameter of the tire is smaller than 1:1 real tire. I could not but move the ground clear too much to copy those positions.
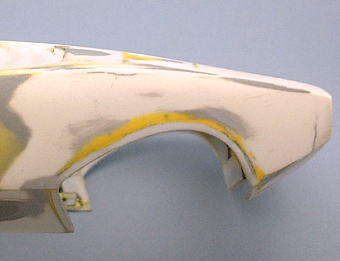
I did a reverse idea this time. I remodeled the outline of the wheel arch
low a little. As a result, an excessive low of ground clear was suppressed.
Of course, it is not perfect copy but I think that it is an appropriate
compromise.
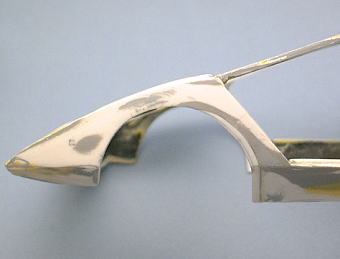
Moreover, when before remodeling I extended the front nose. But the real
front overhang of LP500 is shorter than LP400's one. I moved the position
of the front fender arches front about 5mm.
Painting the Chassis
The basis color is "Flat Black 80%, Neutral Gray 10%, Dark Blue 10%".
Furthermore, I emphasized the outline of mold by painting a shadow and
a highlight.
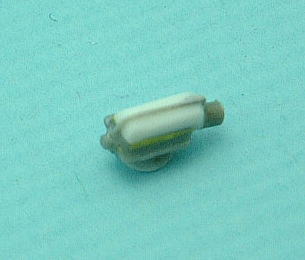
Remodel of the Engine
The form of air cleaner for prototype is different from the 4L engine.
I replicated this parts from plastic sheet.
The equipment parts that attached to left cylinder block are different
from LP400.
I made the cylindrical equipment part for prototype by remodeling LP400
kit parts. I attached this equipment part to the cylinder block. Next,
I piped the water tubes. The water pump was replicated by the same method
as the 4L engine's one.
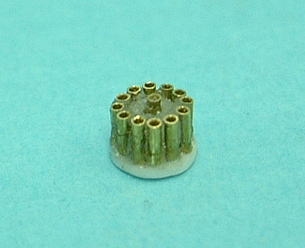
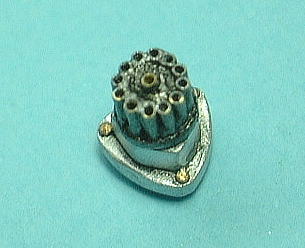
The distributor for prototype is single type. I replicated the distributor cap from 0.5mm diameter brass tubes and plastic beam.
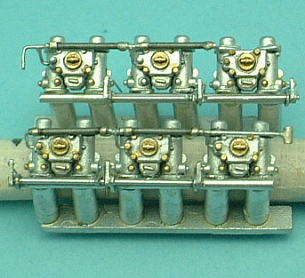
I added more detailing to the carburetors. The direction of the fuel tubes
are reverse in comparison with the 4L engine's.
I attached the each parts to engine block. The color of cam cover seems
to be somber gold. I replicated the color from adding dark yellow to gold.
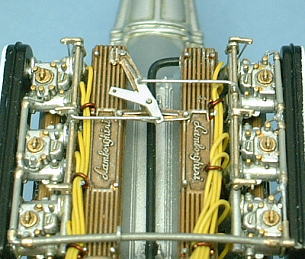
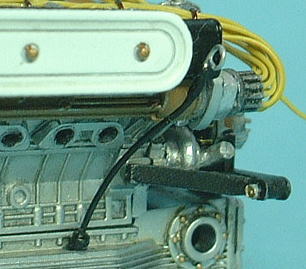
The color of spark plug wires for prototype 5L engine is yellow. I wired
0.45mm diameter yellow codes.
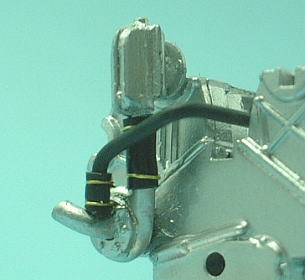
I attached the long fuel hose. That position is this side contrary to the
4L engine.
The hanger for hose slack prevention is the plate type which the hole opened.
I made it from a plastic sheet.
I attached the throttle linkage.
I made the oil gauge from the brass line, and attached it to oil-pan.
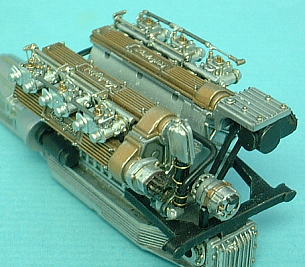
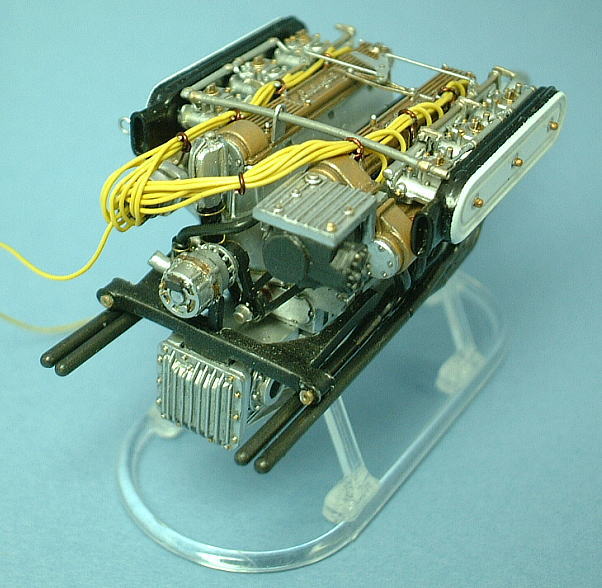
Finished the Engine
Finally the exhaust pipes were attached and the prototype 5L engine was finished.
|
|