 |
 |
 |
 |
 |
 |
 |
 |
 |
 |
|
| The following Japanese famous hobby stores are written in English and can
ship to oversea! |
 |
|
  |
|
 |
|
 |
|
|
|
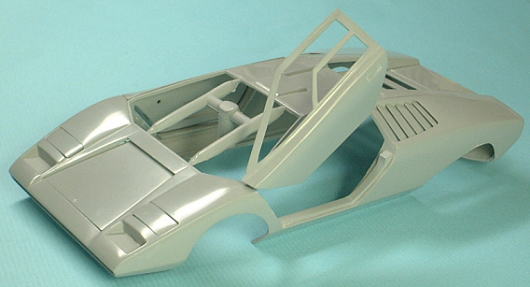
| Remodel of FUJIMI 1/24 scale Enthusiast model Series Lamborghini Countach
LP400 |
| How to build Lamborghini Countach LP500 Prototype |
|
 Step 1: Remodel of Body Step 1: Remodel of Body
 Bury the NACA ducts Bury the NACA ducts
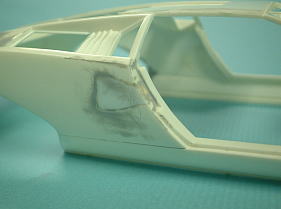
Since LP500 Prototype did not have NACA ducts(Antecedent of NASA duct)
on both-sides I buried these by Plastic board. In the case of LP400, the
door handles are in NACA ducts. However, since the door handles of LP500
Prototype are on the same position as other ordinary cars, I carved them.
I will modify later about window frames.
Remodel of the front view
The remodel points are as follows.
- The front air in takes were deleted.
- The holes of a side signal lamp were buried.
- Since the width of bumper was more narrow than LP400, I modified width of the glue point by plastic sheet.
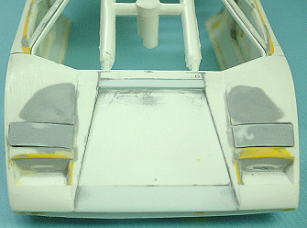
Remodel of the Tail view
The remodel points are as follows.
- Taillights were modified because the form differs a little.
- LP500 Prototype dose not have the stage of a license plate attachment position and shell of body is extended more to the lower part. I modified those points.
- This is a press line. I put epoxy putty a little there because it is difficult to copy this by only shaving.

Addition of Roof bulge
LP500 prototype has the roof bulge for eyehole by periscope. I cut the
specified position on roof and attached it with 0.5mm plastic sheet.
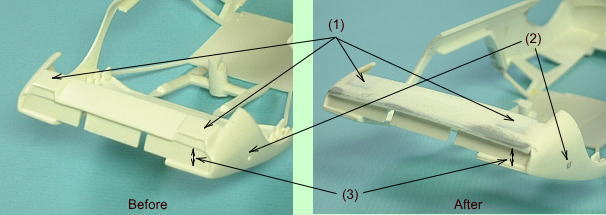
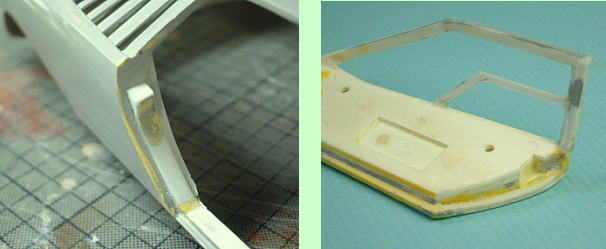
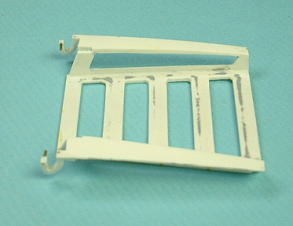
Remodel of Air duct
The form of LP500 prototype's air duct is different LP400's one.
 I buried ventilation duct with plastic sheet, and cut off the fins which are ahead of air intake bulge. I buried ventilation duct with plastic sheet, and cut off the fins which are ahead of air intake bulge.
 I modeled the air duct of LP500 prototype by 0.3mm plastic sheet, and used B pillar as the parts of top fin without cutting it. I modeled the air duct of LP500 prototype by 0.3mm plastic sheet, and used B pillar as the parts of top fin without cutting it.
 I attached the duct fins to equality width. Width is different only for the rearmost fin. I attached the duct fins to equality width. Width is different only for the rearmost fin.
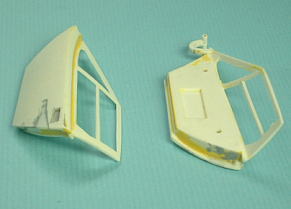
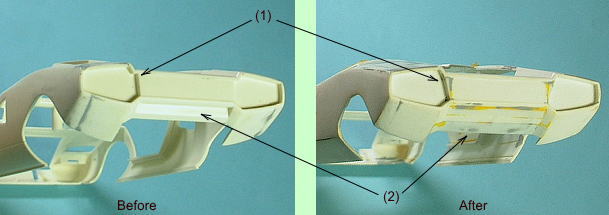
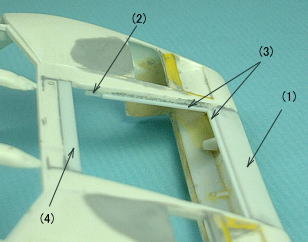
Remodel of Door window frame
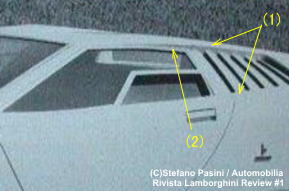 The form of LP500 prototype's door window frame is different LP400's one and is complicated design. The form of LP500 prototype's door window frame is different LP400's one and is complicated design.
- The duct frame line continues to the door frame line.
- This step is a loose slope, and it becomes the same surface as door pillar gradually.
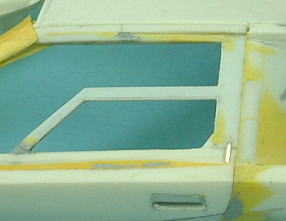 I copied the step of door pillar by putting new frame on the bottom of old frame. Next, I modeled the form of the frame by shaving and putting putty on it. I copied the step of door pillar by putting new frame on the bottom of old frame. Next, I modeled the form of the frame by shaving and putting putty on it.
The door section of a body side has the part like a tenon. I eliminated
the original mold of kit, and replicated this with plastic board and putty.
And since the door section has the mortise, I also replicated this detail.
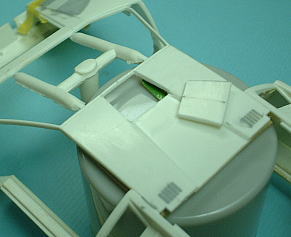
Remodel of Engine bonnet
 Since the frames inside of engine bonnet are see-through look and the rear end of a side frame is a wedge shape, I replicated it. Furthermore I strengthened the hinge by changing it to a metal rod. Since the frames inside of engine bonnet are see-through look and the rear end of a side frame is a wedge shape, I replicated it. Furthermore I strengthened the hinge by changing it to a metal rod.
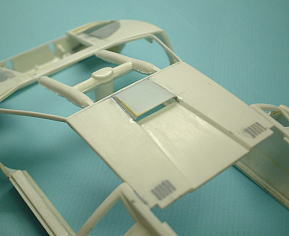
Remodel of front Bonnet
 The design of LP500 prototype is different from the mass production Countach series. As for the front bonnet, front window side is recessed inward, and is designed as air scoop. The design of LP500 prototype is different from the mass production Countach series. As for the front bonnet, front window side is recessed inward, and is designed as air scoop.
I modified the frame.
- Nose part by plastic sheet
- Increased thickness
- The stopper of bonnet door
- Air scoop that was made thin by adding 0.5 mm thin plastic sheets
 The hinge of bonnet is in a front window side. I made it with metal rod,
and extended the length of bonnet only 0.5 mm so that penetrates into the
air scoop a little. The hinge of bonnet is in a front window side. I made it with metal rod,
and extended the length of bonnet only 0.5 mm so that penetrates into the
air scoop a little.
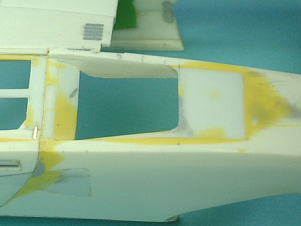
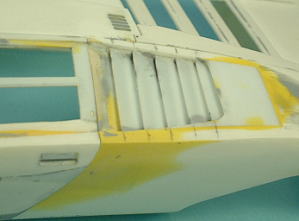
 I assembled the front bonnet tentatively and adjusted the gap of panel line. I assembled the front bonnet tentatively and adjusted the gap of panel line.
After the above coating and polishing work was repeated about 3 times,
the beautiful foundation surface completed it.
|
|