 |
 |
 |
 |
 |
 |
 |
 |
 |
 |
|
| The following Japanese famous hobby stores are written in English and can
ship to oversea! |
 |
|
  |
|
 |
|
 |
|
|
|
| Aoshima 1/24 Itasha series No.1 |
| Step by step report the Itasha Mazda RX-7(FD) "The Melancholy of Haruhi
Suzumiya" |
|
 Step 4 : Modify the Interior 2 Step 4 : Modify the Interior 2
 Dashboard Dashboard
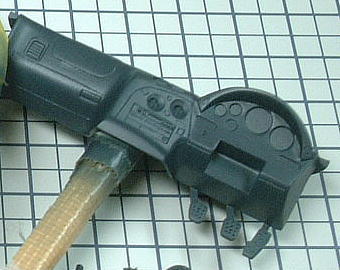
Airbrushed bluish German gray to the dashboad.
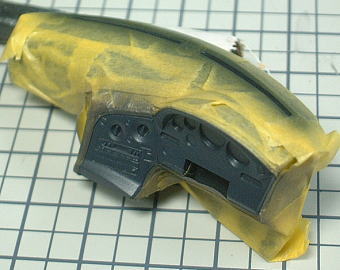
Masked on the crash pad area, and the instrument cluster was airbrushed slightly bright German gray.
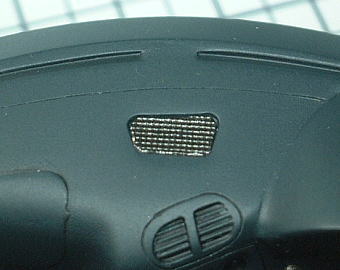
I made the meshed speaker covers of the inner paper of cigarette box that
were painted Gun metal. Slicked the center speaker cover to the Dashboard
with a double sided tape.
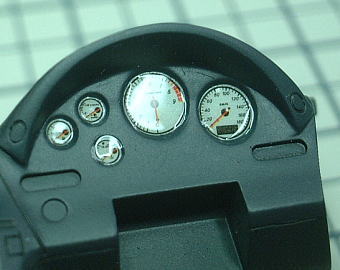
Put the meters decal sheets, and poured the gross clear paint into the
instrument molds.
I made the cigarette lighter of the stretched sprue that was grilled the
tip.
Painted the car audio system and switches.
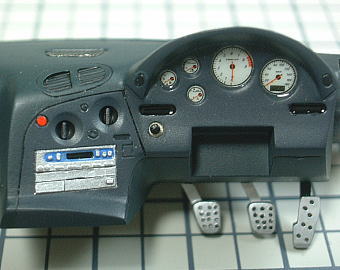
Floor Panel and Rear Seat
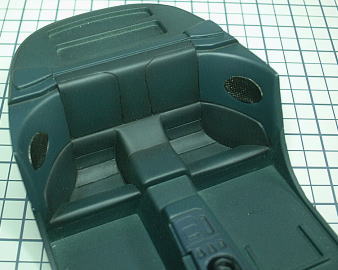
Airbrushed to the floor panel and the tonneau covers with German gray added more flat base.
Masked on the floor panel and the tonneau covers, and airbrushed to the rear seat and rear side panels with the same color as Dashboard.
Masked on the rear side panels, and airbrushed to the rear seat with German gray.
Paint work was finished.
Front Seat
Airbrushed with the lightly bright German gray, and masked on the hem, and airbrushed to the center cushion part with RLM gray.
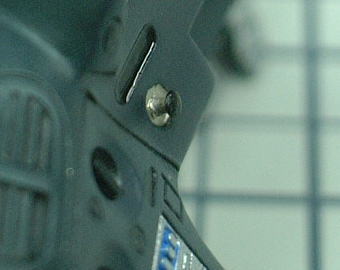
Airbrushed the shadow to the seams. I replicated the reclining lever to the side of passenger seat.
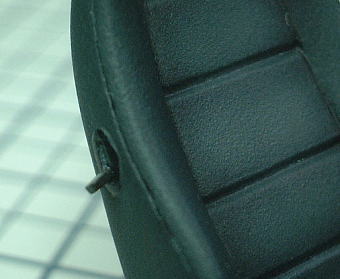
Scratch build the seat belt guides of headrest. Put the the seat belt guide
to the headrest.
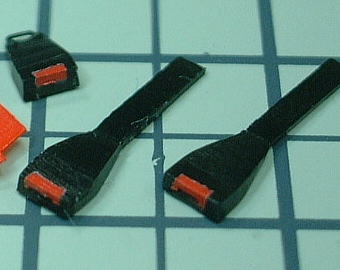
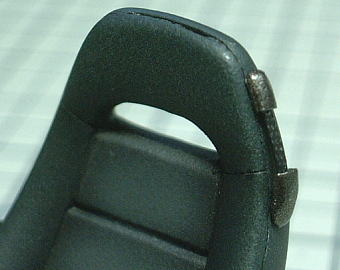
Scratch build the seat belt buckles.
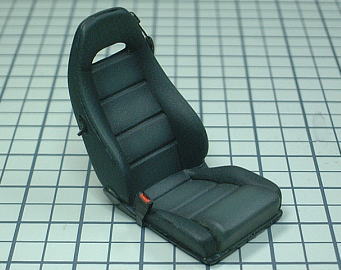
Put the seat belt buckles. the front seat was finished.
Other Parts
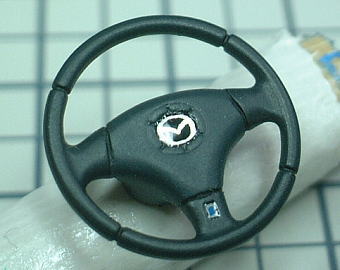
I printed the emblem of Mazda and NARDI on the clear decal sheet with the
Alps MD printer. Those decal were put on the steering wheel., and poured
the gross clear paint into those molds.
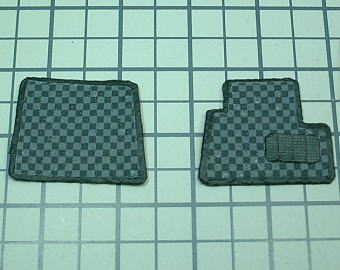
I made the original floor mats. How to build them are this page. (Model Tech Tips)
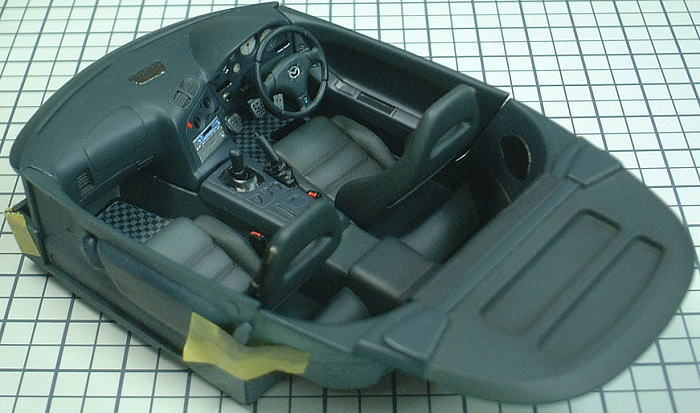
Test Assemble
The interior of RX-7(FD) was completed.
|
|