 |
 |
 |
 |
 |
 |
 |
 |
 |
 |
|
| The following Japanese famous hobby stores are written in English and can
ship to oversea! |
 |
|
  |
|
 |
|
 |
|
|
|
| Remodel of FUJIMI 1/24 scale Enthusiast model Series Lamborghini Countach LP400 |
| How to build Lamborghini Countach LP500 Prototype |
|
 Step 5: Detailing the Engine Bay Step 5: Detailing the Engine Bay
Details of LP500's engine bay were replicated by my guess because the data
is only a few photos. The wiring and plumbing details are unknown.
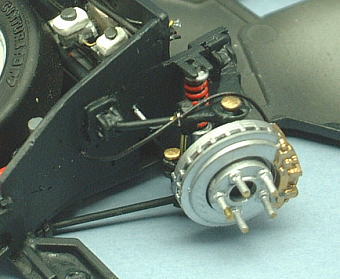
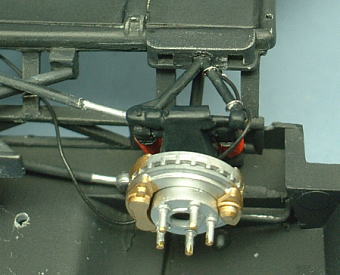
 Wiring the Brake Lines Wiring the Brake Lines
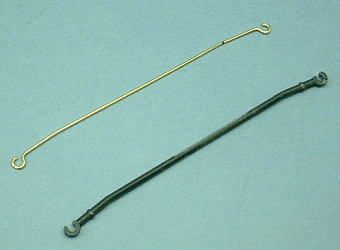
I remodeled the tie-rod for front wheels from 0.5mm brass line because
the parts of kit were fragile.
I wired brake lines.
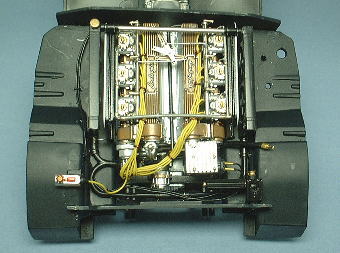
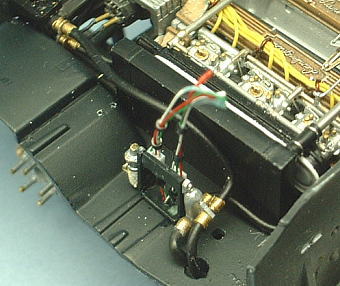
Wiring and Plumbing in the Engine Bay
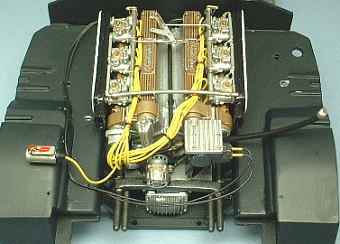
I loaded the engine on chassis.
Two compressor wires were wired along left wall of engine bay.
The ignition coil of LP500 is single because the distributor is single
type.
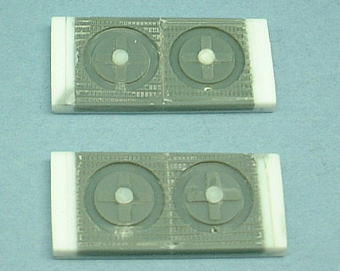
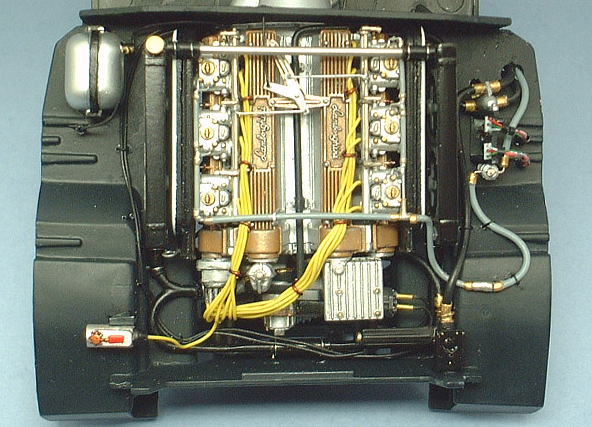
The shape of radiators are different from LP400 because they are vertical mounted layout. I rebuild the radiators from two parts that were tied side by side. I referred to the radiator of Espada.
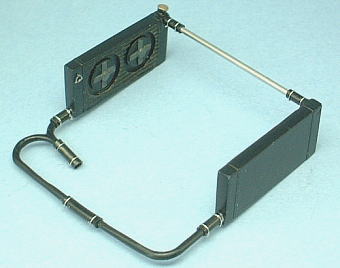
I laid the cooling water pipes to radiators. The plumbing layout of black
pipe is my guess.
I put the radiators and cooling water pipes on the chassis.
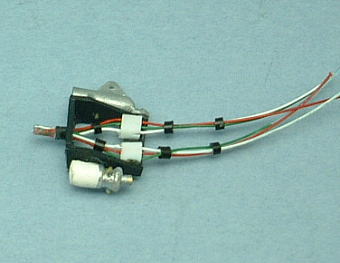
I replicated the oil thermostat, electric connectors and fuel filter. Those
design are my guess that refer to LP400's parts.
About the fuel filter, I guess that it was mounted on right area because
the fuel piping of engine is opposite to LP400.
I put this part on engine bay and connected some oil pipes to it.
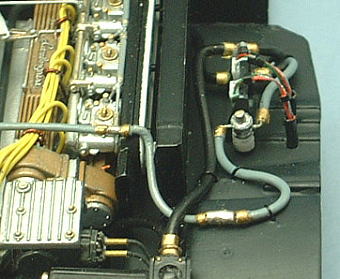
I made the fuel tubes from vinyl tubes. 0.3mm brass wires were inserted to them to bend freely. I painted those fuel tubes and laid them on the engine bay.
Engine Bay was finished
Difference Points of Front Faces of LP400 and LP500
I corrected the front face of LP500 prototype more at this opportunity.
Difference points of front faces of LP400 and LP500 is this.
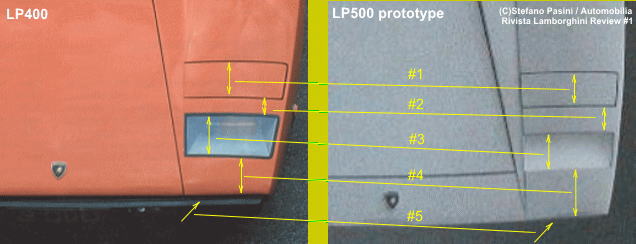 |
| #1. |
About the depth of pop up head lights, LP500 is slightly shorter than LP400. |
| #2. |
About the length between pop up head lights and lens boxes, LP500 is longer
than LP400. |
| #3. |
About the depth of lens boxes, LP500 is shorter than LP400. |
| #4. |
About the length between lens boxes and front nose, LP500 is longer than
LP400. |
| #5. |
About the silhouette of front nose, LP400 is a straight line, but LP500
is a curved line. |
|
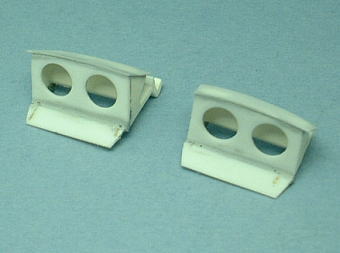
Modeling the Front Grill
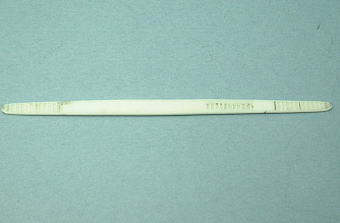
I thought about another method.
I scratch build the vent slits of front grill with a method the same as the conditioner air outlets on dashboard.
Front grill for LP500 prototype was finished.
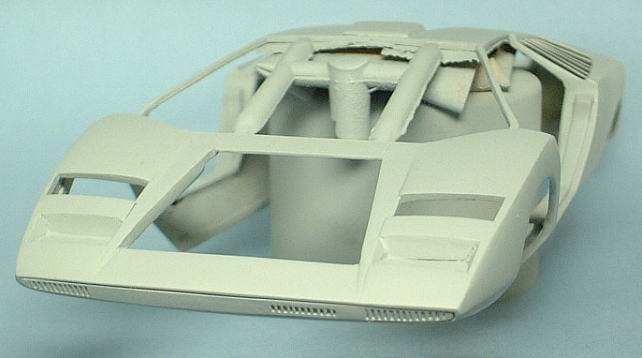
Correction of Front Face
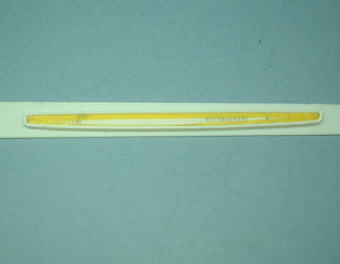
I scratch build the frame of front grill with 0.5mm plastic sheet that
was cut long and narrow. This part also becomes the extension part of front
nose.
I put this frame in front nose, and apply epoxy patty to this gap.
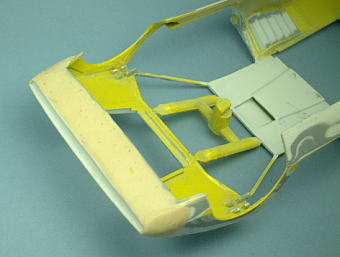
I corrected the depths of pop up head lights and lens boxes with plastic
sheets. Furthermore, I have extended the width of lens boxes outside by
1.0mm.
As a result of these correction works, the front nose was extended by 1.5mm,
and this silhouette became a curved line.
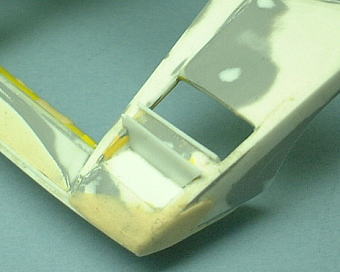
I adjusted the size of pop up head light pods to the corrected body.
I sprayed a surface primer on the body, and checked the revision part.
It looked like the real 1:1 LP500 prototype body further.
|
|