 |
 |
 |
 |
 |
 |
 |
 |
 |
 |
|
| The following Japanese famous hobby stores are written in English and can
ship to oversea! |
 |
|
  |
|
 |
|
 |
|
|
|
| Remodel of FUJIMI 1/24 scale Enthusiast model Series Lamborghini
Countach LP5000QV |
| How to build Lamborghini Countach LP400S |
|
 Step 5: Painting and Assembling Step 5: Painting and Assembling
 Painting the Body Painting the Body
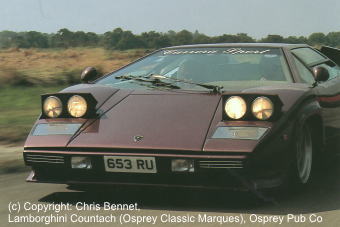
The origin of this model is the countach LP400S carried in the book "Lamborghini Countach (Osprey Classic Marques)" . This body color is brownish metallic purple. It is not marketed as the color for plastic model because it is a rare color. Therefore I made up this color. . This body color is brownish metallic purple. It is not marketed as the color for plastic model because it is a rare color. Therefore I made up this color.
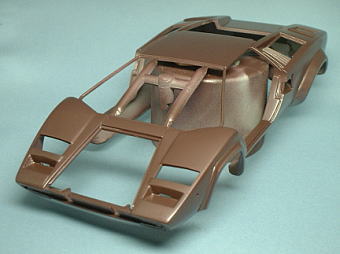
I sprayed the body color. And after drying it, I coated the gloss clear.

I carved window frame lines in the doors.
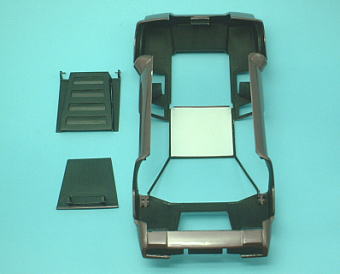
I painted inside of the body on black. Only the roof is white.
Headlight pods and Horizontally hinged doors
I put the headlights and doors to body by same method as LP400.
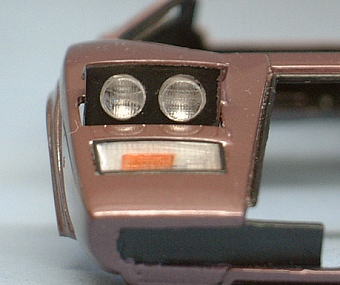
I adjusted an open position of headlight.
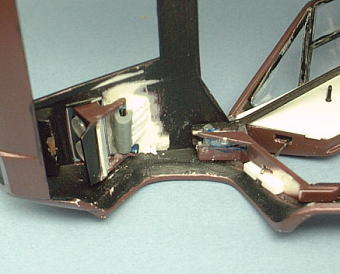
The Engine room light and the stay of engine bonnet
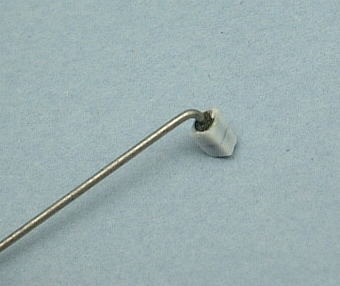
I have scratched the hinge of the stay of engine bonnet from plastic board
and vinyl tube.
I inserted a stainless steel line bent like a L character in the vinyl tube.
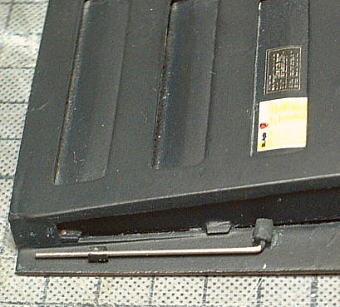
I put it on the inside of engine bonnet. the catch pin is a chip of vinyl tube that have a gap.
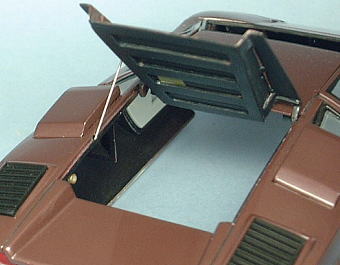
I opened a hole on a frame of engine room and covered it with plastic sheet
on the inside of body. This is a hole to insert the stay.
Front bumper
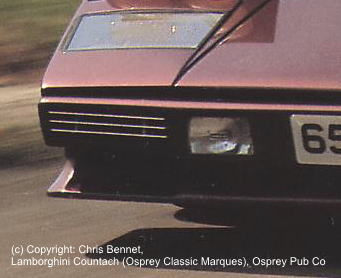
About the fins of air-duct in the front bumper...
I drew the illustration of the correct structure of duct fins. Three fins
are connected with two rods, and are put on two plates.
When three fins are seen from the front, they are parallel, and when they
are seen from the side, they are off to the back and forth because they
are along the silhouette of the bumper. But they are plumb to ground. The
structure is confusing.
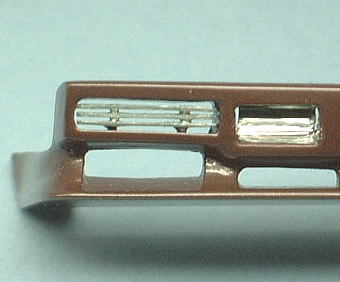
I painted fins chrome silver, and put into the air-duct.
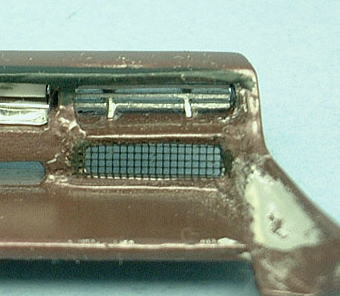
I pasted the mesh to the duct under the fins.
|
|