 |
 |
 |
 |
 |
 |
 |
 |
 |
 |
|
| The following Japanese famous hobby stores are written in English and can
ship to oversea! |
 |
|
  |
|
 |
|
 |
|
|
|
| Remodel of FUJIMI 1/24 scale Enthusiast model Series Lamborghini
Countach LP5000QV |
| How to build Lamborghini Countach LP400S |
|
 Step 3: Detailing the Bonnet Room and Interior Step 3: Detailing the Bonnet Room and Interior
 Side Panels Side Panels
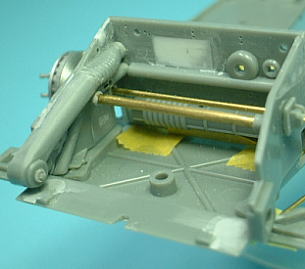
I changed the attachment angle between air duct and conditioning pipe on
right side, and exchanged the beam parts to metal-rods.
I painted bonnet room the chassis black color. Added some detail molds
to right side panel.
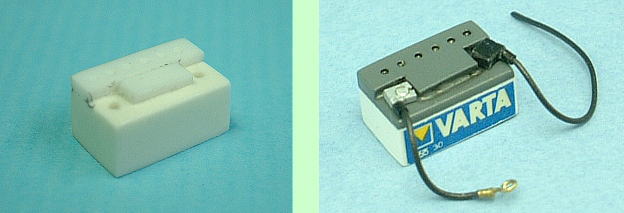
Battery and Tanks
I added some detailing to a battery (lid and electrode terminals).
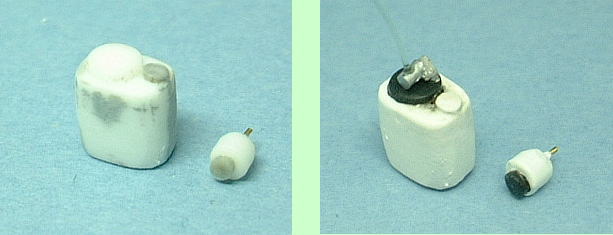
a few reservoir tanks are omitted in this Fujimi kit. Thereupon, I scratch
build those tanks parts from plastic board and beam. The clear tube from
the lid is a fishing line.
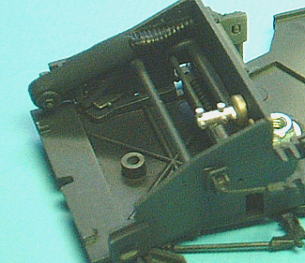
Wiring and Plumbing
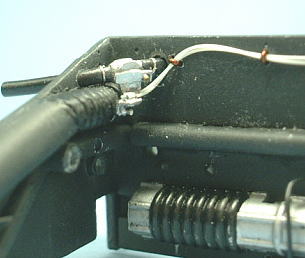
I replicated the thick tube and joint fittings at the right corner of bonnet
room.
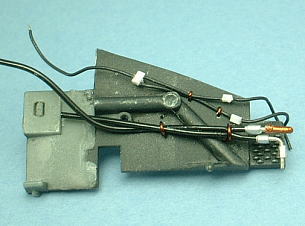
A left side side panel has much wiring and plumbing. I replicated them
roughly. A few small white chips are electric connectors. Two thick hoses
are air-conditioner pressure hoses. I replicated the cocks of tips in detail.
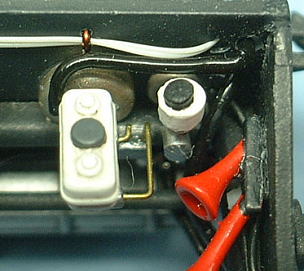
I replicated the brake pipes from brass wire, and added clutch master cylinder
reservoir tank.
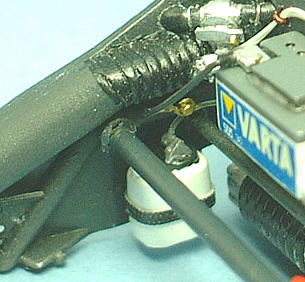
The wire from the the negative pole of battery is grounded to tube frame
of right side panel. I add the front windshield washer tank to the bottom
of it.
Finished the Bonnet Room
Thus, the bonnet room became still more like a real one.

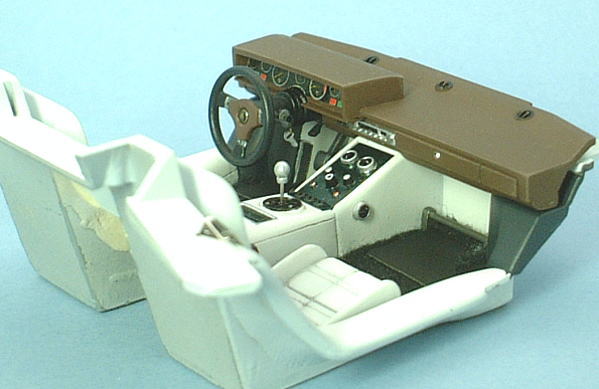
Remodel of the Cabin

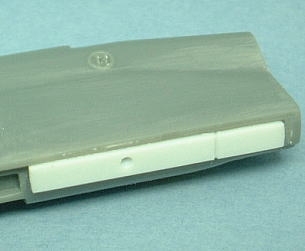
The parking brake position of LP400S is right side. It is reverse with LP400. I filled up the slit for parking brake, and put the parking brake cover to the side of transmission tunnel.

The interior design of countach is covered with leather and smooth curved surface. But it is not seen the kit part like that because it is square. I planed the angles and smoothed like a real one.
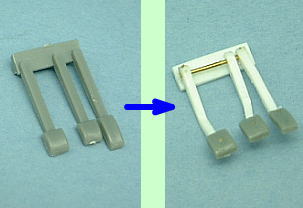 Accelerator, clutch and brake pedals of this kit are very cheap. I modified them like the real car. Accelerator pedal of LP400S is a hanging type same as clutch and brake pedals. Accelerator, clutch and brake pedals of this kit are very cheap. I modified them like the real car. Accelerator pedal of LP400S is a hanging type same as clutch and brake pedals.
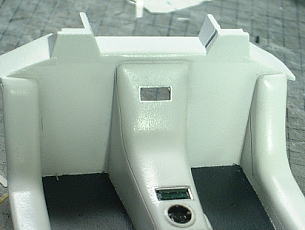
I painted the interior in white, and gave it the gloss feel of a leather-covered
by polishing this surface with tissue. Furthermore, I replicated the stitches
of leather by carving the lines on it. These are new trials.
Dashboard & Steering System
The form of glove box is mistaken. I modefied it with plastic boad.
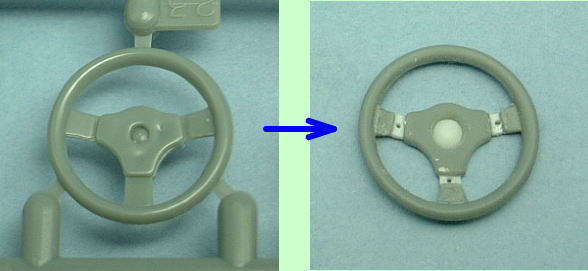
As for steering wheel part, I added more detailing to spokes, and modified
horn switch's size.
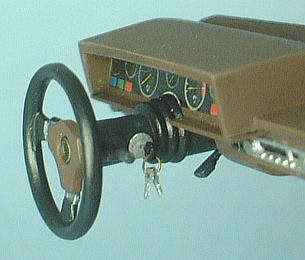
Owner's key of countach is one set in three. Those are for "engine
starter", "open doors" and "fuel lids". I modeled
them with Plastic paper and brass line. Black head covered key is engine
starter.
Ignition switch is in right side of steering column. I modeled it, and
plugged engine starter key there. Next, I put steering column to dashboard,
and added the steering wheel adjusting lever to right side of it.
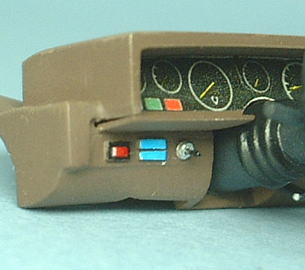
I corrected the warning light and switch at the lower left of meter panel
because those are wrong.
Some Detailing parts
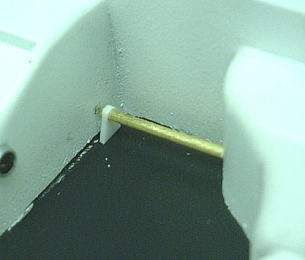
I replicated the footrest bar of passenger seat floor with a brass beam.
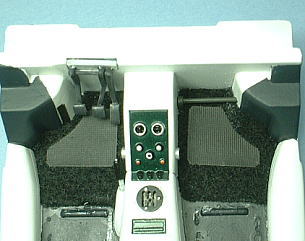
I replicated the floor carpets from a felt. The skid rubber sheets are
a wrapping paper of cigarette. I painted it in mat black.
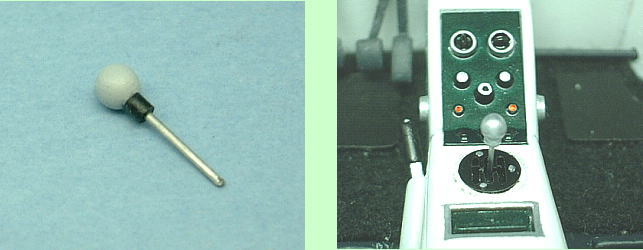
Optional Shift Knob
The shift knob in this model is not normal part but option part. That is
a sphere and chromium-plated. I modeled it with epoxy putty. The shift
gate plate part is photoetch from Yorozuya.
Sheets & Seat Belts
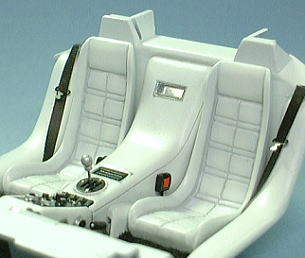
I put the seat belts. Those are detail up parts from Modelers, and buckles
are Yorozuya product.
I put the seats and painted light-shadow on the stitchs by airbrush.
Interior was finished
As a result of my eager research, I could add more detail and give more
high quality to this interior.
|
|