| Welcome to J-Model Works! (Japanese Title, Mokei no Hanamichi) My Models, Step by Step, Tips, Information, and so on! |
|
| HOME>>Model Gallery>>Fujimi 1/24 Lamborghini Countach LP400>>This page
|
|
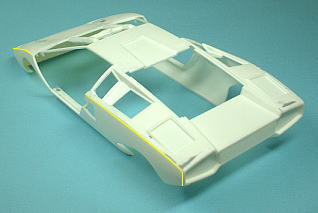
This model has some dents, parting lines and distortions by molding. I modified them. Furthermore, this model is fragile because this plastic resin is very soft. Therefore, if the action parts like door or light are opened and closed repeatedly, those will break very easily. And that repair may be difficult for model beginner. I reinforced those hinges by inserting the brass lines for the client. The durability of this model was improved substantially by this work.
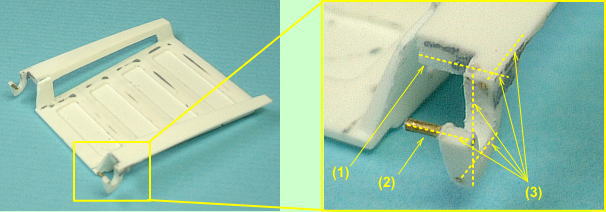
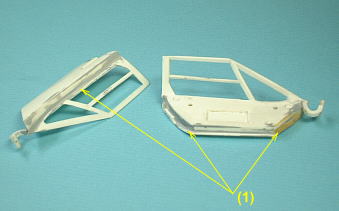
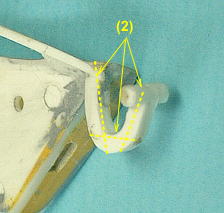
These part have some dents. I modified it carefully. The mesh is attached on the side part of engine-hood of areal car. I cut the part, to reproduce it. Furthermore, the hinge of this part is most fragile. I reinforced this hinge by inserting some brass lines inside it and added plastic board.
The parts which constitute horizontally hinged doors don't combine precisely, because they are inaccurate. And the unnecessary press line is molded to the basement of window frame. I modified them with polyester putty. Furthermore, I reinforced door hinges with 0.5 mm and 0.3 mm brass lines.
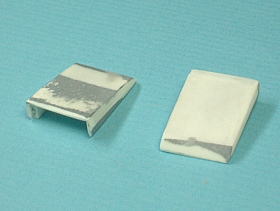
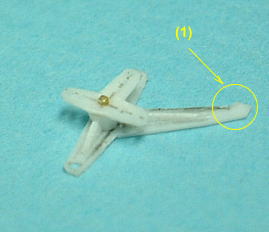
The form of air-intake bulge parts is distorted for the contraction of plastic resin and corner is blunt. I modified them with putty and plastic board.
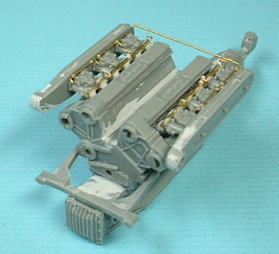
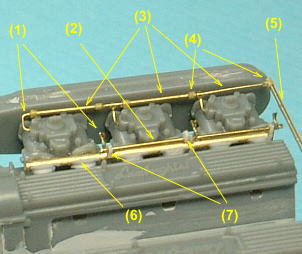
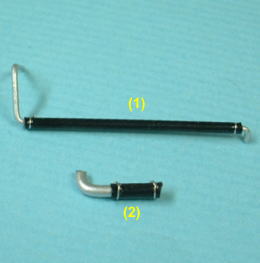
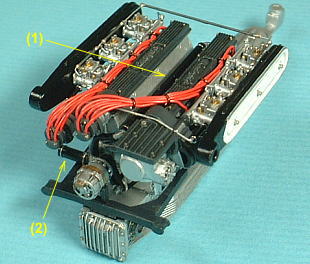
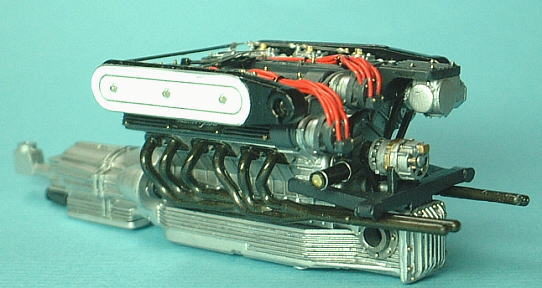
I set up each parts of engine and modified those gaps with putty. Next, I added some pipes and throttle linkage & shaft of periphery of carburetor that were omitted with brass lines and tubes.
I added big cooling pipes and hoses that are connected to radiator through the center of V-bank, after I painted engine. Those were made with brass lines and vinyl tubes for electric repair. Next, I added spark plug cords from "MODELLERS" to the engine.
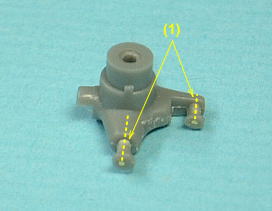
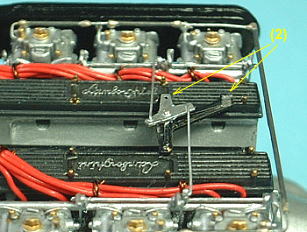
I made the stay that is linking between throttle linkage and throttle cable, because it was omitted in this kit. The linkage rods are 0.2 mm brass lines. It became a furthermore real engine by this work.
I painted shadow and high light, next I attached exhaust pipes. It finished to a fascinating engine.
|
|
|||||||||||||||||||||||||||||||||||||||||||||||||||||||||||||||
| Return to Top of This Page
HOME>>Model Gallery>>Fujimi 1/24 Lamborghini Countach LP400>>This page |
|
Copyright(C) Omami the webmaster of J-Model Works / Mokei no Hanamichi All right reserved |